[Angular] Native iOS and Android App - Capacitor
![[Angular] Native iOS and Android App - Capacitor](https://images.unsplash.com/photo-1585060544812-6b45742d762f?crop=entropy&cs=tinysrgb&fit=max&fm=jpg&ixid=MnwxMTc3M3wwfDF8c2VhcmNofDV8fG1vYmlsZXxlbnwwfHx8fDE2NTA2NjU4MzM&ixlib=rb-1.2.1&q=80&w=1460)
In this blog post we will go through the initial process of how to convert an existing angular project into a cross-platform project. Our focus is on iOS and Android.
In addition to this, I show you how to speed up developing and especially testing the app.
Setup
- Code Editor - VS Code
- Test Project - Tour of Heros
Test Project
(You can skip this section if you have your own project)
Head over to the Angular Tour of Heros page and download the example. Unpack it, open it with VS Code or any other IDE and install the node modules.
npm i

// At Angular 13 I ran in some errors with the current package.json
// just delete "angular-in-memory-web-api" and all "jasmine-x"
// references in the package.json file and you should be fine
Check if the app is buildable:
ng s
// open your browser at http://localhost:4200/
Install Capacitor
Head over to the root of your angular application and install the packages.
npm i @capacitor/core
npm i @capacitor/cli --save-dev
The capacitor cli commands are very easy - we will start with initializing the config.
npx cap init
Afterwards, you will find a capacitor.config.ts file in the root of your project. It defines some basic app values. You will find the full property list here.
Add the packages for the platform you want to support.
npm install @capacitor/android
npm install @capacitor/ios
The following commands add an android and iOS folder to the root of your angular application. You can open this folders with Android Studio or Xcode.
npx cap add android
npx cap add ios
Speed Up Development
Normally, capacitor copies the content from the dist folder and pastes it into each platform folder. The phone will creates its own server and host these files on its own localhost. This is fine in production mode but when we are developing we want to see changes as fast as possible.
So we do not want to build the app first, sync it to the platform folder and rebuild it to see changes. We are used to the watch mode from angular.
Add the following to the capacitor config which we created with the npx cap init command.
const config: CapacitorConfig = {
  ...,
  webDir: undefined,
  server: {
    url: 'http://<ipToYourAngularMachine>:4200',
    cleartext: true, //needed for android
  },
};
When the url property is set, capacitor skips the creation of the own server and uses the url we specified instead.
This means the phone app will react the same way as on the computer browser. If you change code and save it, the app reloads and we see the changes immediately.
Android App
You will need Android Studio for this section, you can download it here.
As we have changed the capacitor config we have to sync the changes into the android folder.
npx cap sync android
You will find the android capacitor config here:
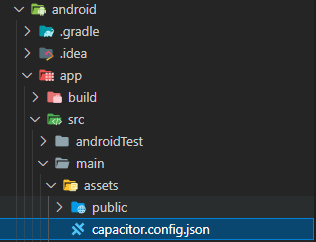
If they look the same, let's open up android studio. You can do this with the project picker from android studio or just type the following command.
npx cap open android
To access your angular app with a device within the network with your current IP, you have to use to following serve parameter.
ng s --host 0.0.0.0
Now you are ready to start the app with android studio on your phone or simulator.
If you don't want to open android studio, you can use this command to start the app.
npx cap run android
iOS App
You will need a Mac for this section. As I currently don't have one (waiting for M2) the tutorial could be missing something. But it is very similar to android so it should be alright.
Sync the capacitor config changes to the ios folder.
npx cap sync ios
Open the Xcode project.
npx cap open ios
The app should be buildable, select a simulator and start the app.
Don't forget to start the angular application.
ng s --host 0.0.0.0


Georg Hoeller Newsletter
Join the newsletter to receive the latest updates in your inbox.
![[Angular | Storybook] Tailwind, Directives, Content Projection, Icons and i18n](https://images.unsplash.com/photo-1508780709619-79562169bc64?crop=entropy&cs=tinysrgb&fit=max&fm=webp&ixid=M3wxMTc3M3wwfDF8c2VhcmNofDE4fHxtYWN8ZW58MHx8fHwxNjk0NDU4OTkyfDA&ixlib=rb-4.0.3&q=80&w=1460)
![[Angular | RxJS] BehaviorSubject with custom states](https://images.unsplash.com/photo-1504805572947-34fad45aed93?crop=entropy&cs=tinysrgb&fit=max&fm=webp&ixid=MnwxMTc3M3wwfDF8c2VhcmNofDE0fHxzdGF0ZSUyMGNoYW5nZXxlbnwwfHx8fDE2ODE1NTQ4NTg&ixlib=rb-4.0.3&q=80&w=1460)
![[Angular] Dynamic App Config and Translations in a Submodule](https://images.unsplash.com/photo-1484807352052-23338990c6c6?crop=entropy&cs=tinysrgb&fit=max&fm=webp&ixid=MnwxMTc3M3wwfDF8c2VhcmNofDN8fG1hY2Jvb2t8ZW58MHx8fHwxNjc2MTg4MzE5&ixlib=rb-4.0.3&q=80&w=1460)