[Angular Material] Dynamic Dialog Component
![[Angular Material] Dynamic Dialog Component](https://images.unsplash.com/photo-1503252947848-7338d3f92f31?crop=entropy&cs=tinysrgb&fit=max&fm=jpg&ixid=MnwxMTc3M3wwfDF8c2VhcmNofDZ8fGNvZGluZ3xlbnwwfHx8fDE2MjQ3MjQ3MDc&ixlib=rb-1.2.1&q=80&w=1460)
You know the struggle with angular dialog components when you create mainstream business software. Sometimes I feel like I'm just doing the same for each page again and again. Place a header, some type of grid and finally add all dialogs to it - like "Do you really want to delete it?".
But somehow every dialog is slightly different, so you can't reuse the whole dialog for each grid. Recently I stumbled over 10 of these kinds of components which are all the same but not really. The next thought was - "If we had to change anything around the main content of the dialog we have to change it 10 times".
Could we do better? I think so!
If you are just interested in the source code: Stackblitz

The Only Component We Need
Let us create a new component for our new all-in-one-dialog. Navigate to your preferred location and let the angular CLI work:
ng g c dynamic-dialog
Header over to the TS-File and let us prepare everything for being a dynamic component. For this, you need to inject the MAT_DIALOG_DATA injectionToken to share data with your dialog. Your constructor should look like the following:
constructor(@Inject(MAT_DIALOG_DATA) public data: IDynamicDialogConfig)
For typesafe data transfer between your component I created an interface "IDynamicDialogConfig" which is defined like this:
export interface IDynamicDialogConfig {
  title?: string;
  acceptButtonTitle?: string;
  declineButtonTitle?: string;
  dialogContent: TemplateRef<any>;
}
Properties:
- Title: Defines the Dialogs Title
- TextAcceptButtonTitle: Right-sided Button Text (positive feedback)
- DeclineButtonTitle: Left-sided Button Text (negative feedback)
- DialogContent: The dynamic content we want to display (more later)
Open up the HTML-File and put in your base dialog styling. I go with the angular material default and added the properties above to make everything dynamic:
<h2 mat-dialog-title>{{ data.title }}</h2>
<mat-dialog-content>
  <ng-container [ngTemplateOutlet]="data.dialogContent"> </ng-container>
</mat-dialog-content>
<mat-dialog-actions>
  <button *ngIf="data.declineButtonTitle" mat-button mat-dialog-close>
    {{ data.declineButtonTitle }}
  </button>
  <button mat-button [mat-dialog-close]="true" cdkFocusInitial>
    {{ data.acceptButtonTitle }}
  </button>
</mat-dialog-actions>
That's all for our dynamic dialog component - pretty basic!
Create and showing the dynamic templates
Now navigate to the component where you need to open the dialog and open the HTML-File to create the dynamic templates. You can place them anywhere you want. I normally put them at the bottom. (they don't get rendered)
<!-- Plain Text Example -->
<ng-template #yesNoDialogTemplate>
  <span>Do you really want to delete it?</span>
</ng-template>

<!-- Data Example -->
<ng-template #dataDialogTemplate>
  <span>Count is: {{ count }}</span>
</ng-template>
When you are finished with your templates we have to load them into a TemplateRef variable. We will use ViewChild for this task - head over to your components TS-File:
@ViewChild('yesNoDialogTemplate') yesNoTemplate: TemplateRef<any> | undefined; @ViewChild('dataDialogTemplate') dataTemplate: TemplateRef<any> | undefined;
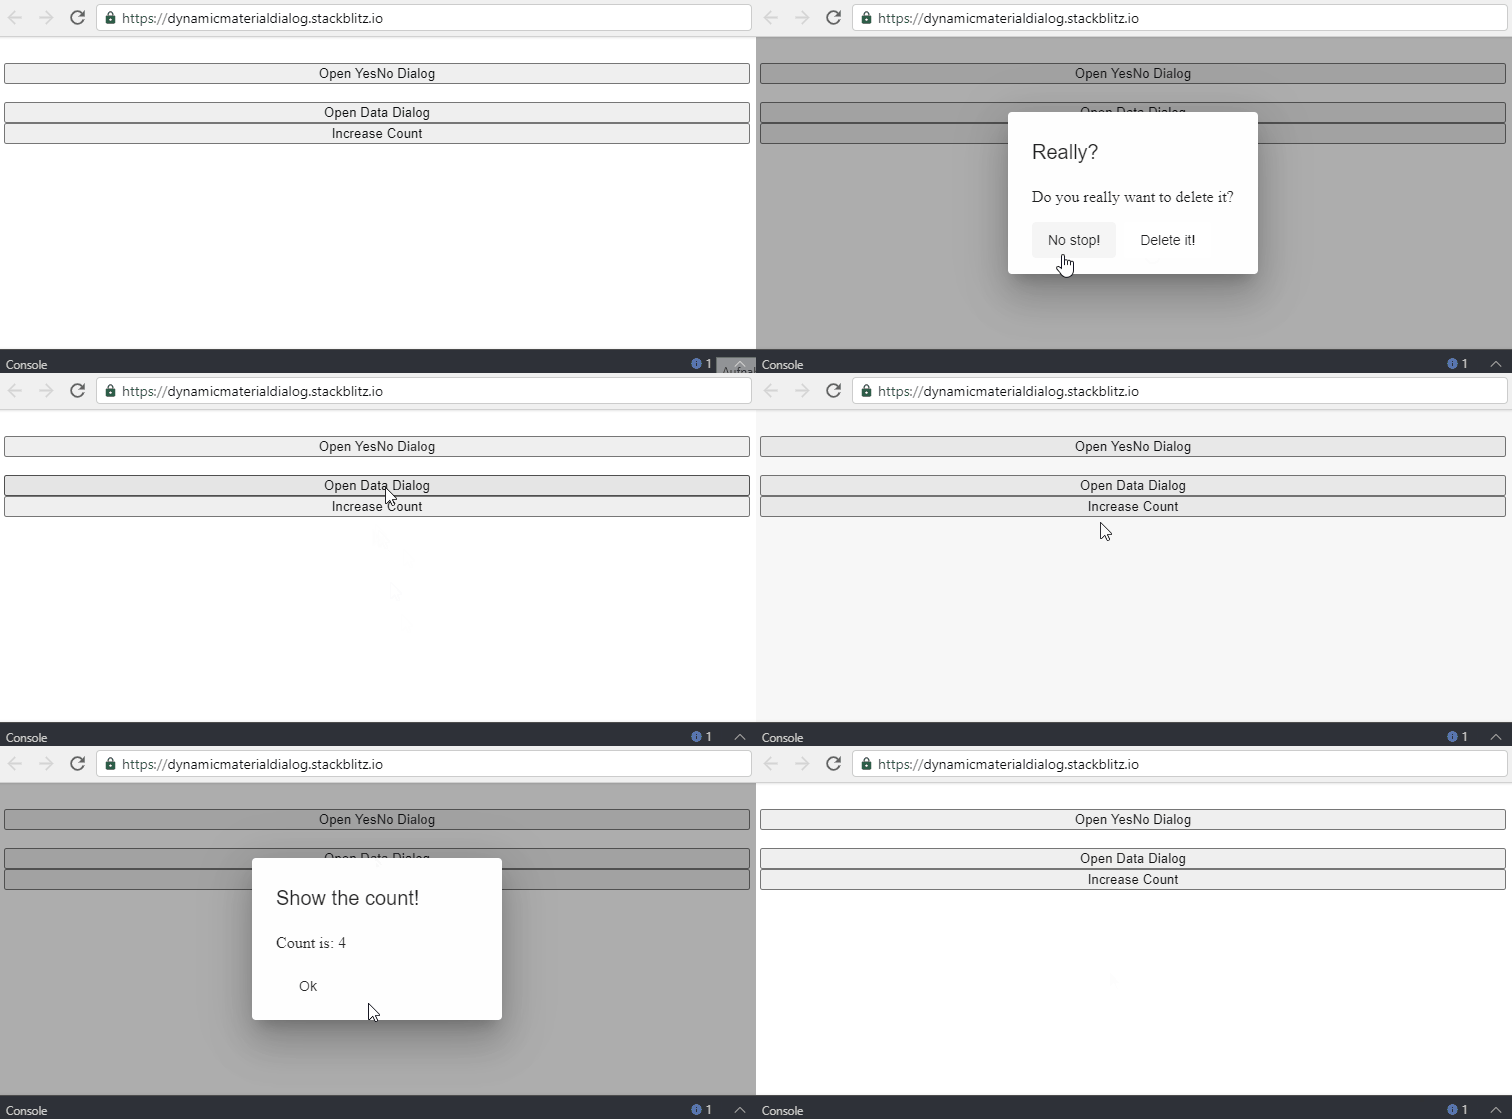
Now all we have to do is to open up our dialogs! For testing purposes I created three buttons, a count variable and three functions:
HTML:
<div style="display: flex; flex-direction: column">
  <button (click)="openYesNoDialog()">Open YesNo Dialog</button>
  <br />
  <button (click)="openDataDialog()">Open Data Dialog</button>
  <button (click)="increaseCount()">Increase Count</button>
</div>
TS:
count: number = 0;

@ViewChild('yesNoDialogTemplate') yesNoTemplate: TemplateRef<any> | undefined;
@ViewChild('dataDialogTemplate') dataTemplate: TemplateRef<any> | undefined;

constructor(public dialog: MatDialog) {}

openYesNoDialog() {
  const dialogRef = this.dialog.open(DynamicDialogComponent, {
    width: '250px',
    data: <IDynamicDialogConfig>{
      title: 'Really?',
      dialogContent: this.yesNoTemplate,
      acceptButtonTitle: 'Delete it!',
      declineButtonTitle: 'No stop!',
    },
  });

  dialogRef.afterClosed().subscribe((result) => {
    if (!result) return;
    // delete it
  });
}

openDataDialog() {
  const dialogRef = this.dialog.open(DynamicDialogComponent, {
    width: '250px',
    data: <IDynamicDialogConfig>{
      title: 'Show the count!',
      dialogContent: this.dataTemplate,
      acceptButtonTitle: 'Ok',
      declineButtonTitle: '',
    },
  });
}

increaseCount() {
  this.count++;
}
As you see in the code above you can give the TemplateRef to your dialog and show it there. This even works with data! Just hit the increaseCount Button and open up the dialog. You will see the updated count in the dialog - awesome!
Running in trouble? Check the source code at Stackblitz

If you have further questions about this topic or need help with a problem in general, please write a comment or simply contact me at yesreply@georghoeller.dev :)
Georg Hoeller Newsletter
Join the newsletter to receive the latest updates in your inbox.

![[Angular | Storybook] Tailwind, Directives, Content Projection, Icons and i18n](https://images.unsplash.com/photo-1508780709619-79562169bc64?crop=entropy&cs=tinysrgb&fit=max&fm=webp&ixid=M3wxMTc3M3wwfDF8c2VhcmNofDE4fHxtYWN8ZW58MHx8fHwxNjk0NDU4OTkyfDA&ixlib=rb-4.0.3&q=80&w=1460)
![[Angular | RxJS] BehaviorSubject with custom states](https://images.unsplash.com/photo-1504805572947-34fad45aed93?crop=entropy&cs=tinysrgb&fit=max&fm=webp&ixid=MnwxMTc3M3wwfDF8c2VhcmNofDE0fHxzdGF0ZSUyMGNoYW5nZXxlbnwwfHx8fDE2ODE1NTQ4NTg&ixlib=rb-4.0.3&q=80&w=1460)
![[Angular] Dynamic App Config and Translations in a Submodule](https://images.unsplash.com/photo-1484807352052-23338990c6c6?crop=entropy&cs=tinysrgb&fit=max&fm=webp&ixid=MnwxMTc3M3wwfDF8c2VhcmNofDN8fG1hY2Jvb2t8ZW58MHx8fHwxNjc2MTg4MzE5&ixlib=rb-4.0.3&q=80&w=1460)